
The default search function in Nextcloud is a simple program that can find a document if you happen to correctly remember a word in the file name you are looking for. If you want to search for any text in the contents of Files, Notes, Bookmarks and in other apps that save their content as files, you need a full text search solution for Nextcloud. Elasticsearch can deliver it to you.
Elastic is a complex general purpose indexing system that the company behind the product provides both as a service and as a downloadable product primarily for enterprises and public administration. Nonetheless, a free version of the search program is available in Nextcloud Apps directory. Elasticsearch can be installed and configured manually after Nextcloud server is up and running.
Usually, when an app is available in the Apps directory, it means the app is easy to install. That’s not the case with Elasticsearch. It can be confusing to set up with instructions scattered around in many places. Here is our guide for setting up Elasticsearch for Nextcloud.
The system configuration that we had when we studied Elasticsearch was Nextcloud 18 (Hub), PHP 7.3, Elasticsearch server 6.8.6, Elasticsearch app 1.5.0 and Java openjdk 11.0.6, all running on the same Debian 10 server.
Before you start, it is worth noting that Elasticsearch requires a large share of system resources. Once the new shiny search engine is running, you’ll see that the default configuration of Elasticsearch has allocated more than 1GB of RAM.
1. Install Nextcloud apps for Elasticsearch
In your browser, open Nextcloud Apps directory, select Search in the left pane, and install three Search apps:
Full text search

Full text search - Elasticsearch platform

Full text search - Files

(Full text search - Bookmarks: this was untested, so we didn't try it)
Next, let’s jump deep into Elasticsearch engine installation.
2. Install Elasticsearch server programs
First, you must install Java runtime on your server if you already don’t have it. Enter, for instance, the following command to check for Java:
java --version
If you need to install Java (on Debian):
apt-get install openjdk-11-jre
The command installs the Open jdk version of Java. Another choice is Oracle Java.
Second, install apt-key for the Elastic server (source):
wget -qO - https://artifacts.elastic.co/GPG-KEY-elasticsearch | sudo apt-key add -
Third, add Elastic repository into your system:
echo "deb https://artifacts.elastic.co/packages/6.x/apt stable main" | sudo tee -a /etc/apt/sources.list.d/elastic-6.x.list
Fourth, install the search engine:
apt-get update
apt-get install elasticsearch
If you want to search inside PDF and other non-ascii text documents, install a plugin (adjust the beginning of the path to your system – bin/elasticsearch-plugin is constant):
/usr/share/elasticsearch/bin/elasticsearch-plugin install ingest-attachment
3. Start the full text search engine
systemctl start elasticsearch
Commands stop and status let you stop the engine and view its status.
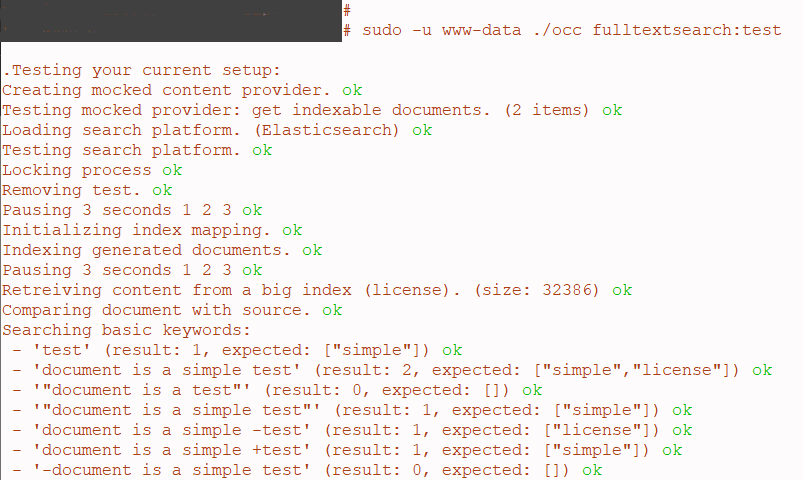
4. Test the setup
Run the following command to test the setup so far (even if you are root, you must sudo because the command must be run as www-data):
sudo -u www-data ./occ fulltextsearch:test
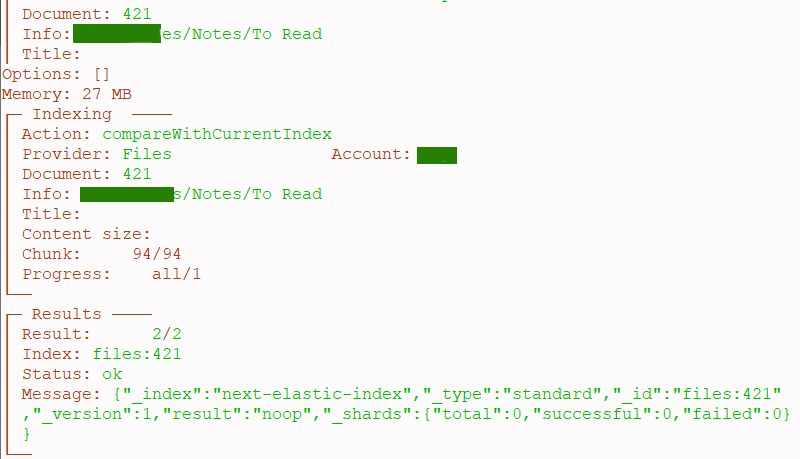
5. Indexing
The first time, indexing of content must be started manually:
sudo -u www-data ./occ fulltextsearch:index
After this, the index should update automatically. It may, however, take days (I think it took a week to update our test system) for the index to update in the free version of the software. Commercial version updates the index much faster.
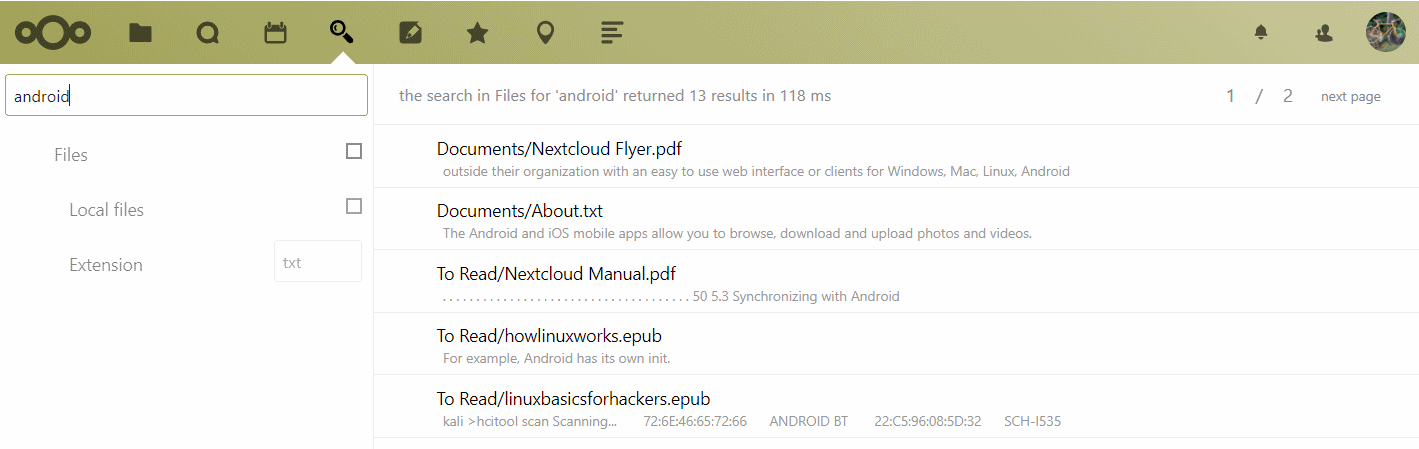
You Are Ready to Search
Open Nextcloud in your browser and select the Search tool in the top toolbar.
a timesaving help, thanks!