
Update 2021-11-07: I have written a new section that shows you how to configure exim4 if the direct SMTP send method is rejected by email providers.
Many server software applications, like WordPress and Nextcloud can send alerts and notifications to the system admin and to users. Email is the most universal method for sending messages, but you have to run an email server (SMTP server) on the host. Processing incoming email messages is really resource consuming, but for alerts and notification messages, the server only needs to send messages, not receive them. Here is a guide for setting up exim4 email server in send-only mode on Debian 10 Linux. Configuration of exim4 on Ubuntu is similar.
Depending on how your Debian system was set up, an email server like exim, Postfix or Qmail may already be installed on your host. You can test if you already have exim4 on your system:systemctl status exim4
If the response is active (running), you can continue to configuration. Otherwise, install exim4:apt-get install exim4
Configuring exim4 to directly send email
The SMTP function in exim4 can directly transmit email messages towards their final destinations from your server. This section shows how to set it up. The port 25 must be open on your server. In addition, many email hosting providers require that Reverse DNS has been setup for the sending IP address. An alternative method – smarthost – that doesn’t require Reverse DNS record is explained later in this guide.
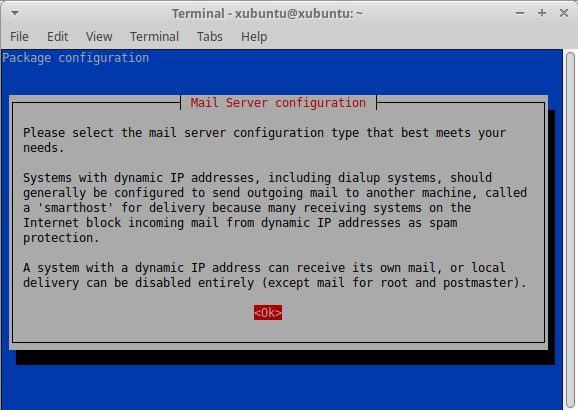
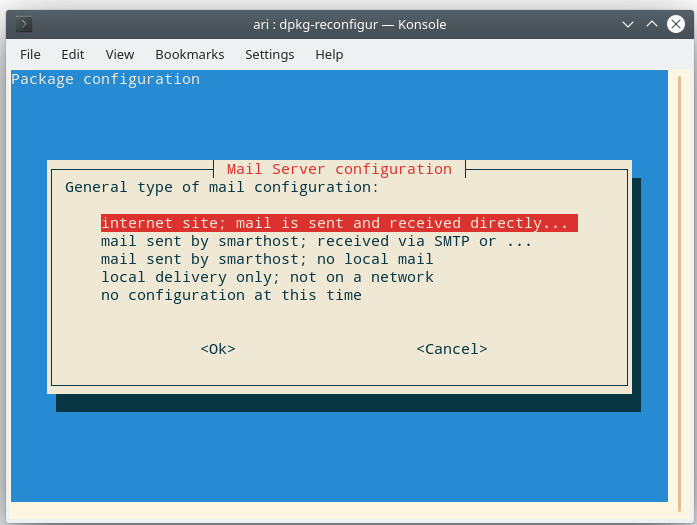
On Debian, exim4 comes with a configuration tool that is started like this:dpkg-reconfigure exim4-config
The first question wants to know the type of email server you would like to have. Choose (don’t worry because later, mail receive will be prevented):Internet site; mail is sent and received directly
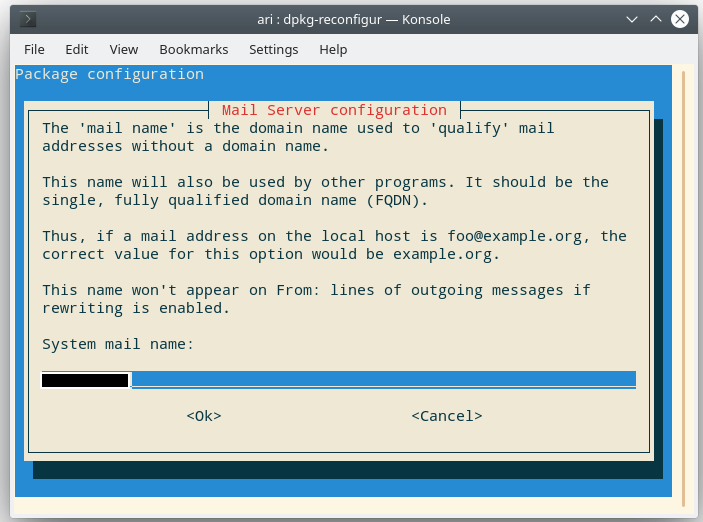
Next, you must enter a valid domain name. If you are configuring, for instance, a laptop it probably doesn’t have a top level domain name. Enter a domain name you have.
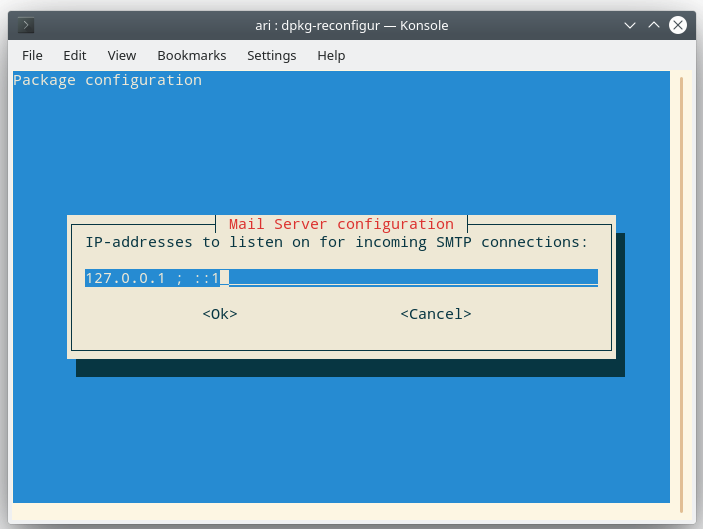
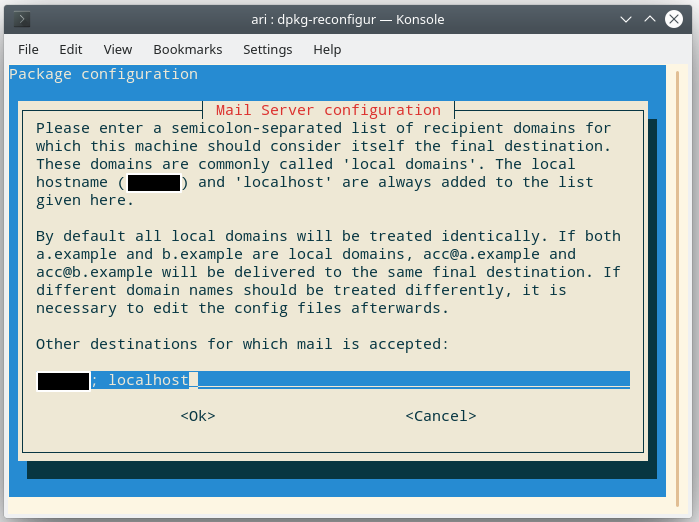
In this step, you can prevent exim4 from receiving any mail. Entering the localhost address tells the email server not to listen to incoming messages.127.0.0.1
You can accept the suggested names: your hostname and localhost in this step. In any case, the server won’t be receiving messages.
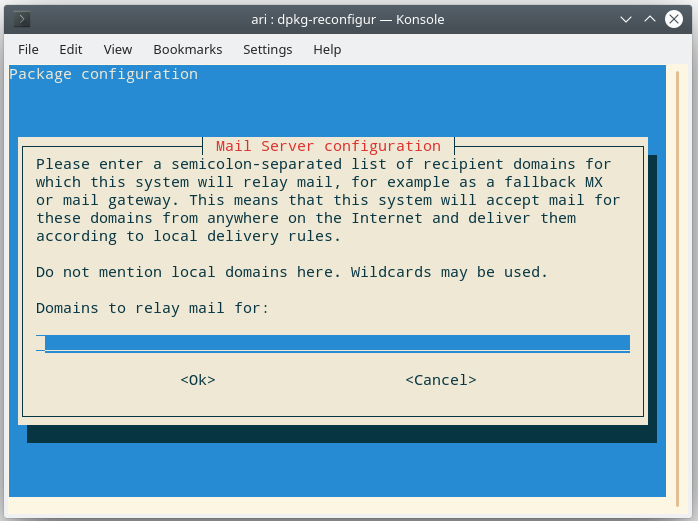
This mail configuration won’t relay messages, so you can leave the relay field blank.
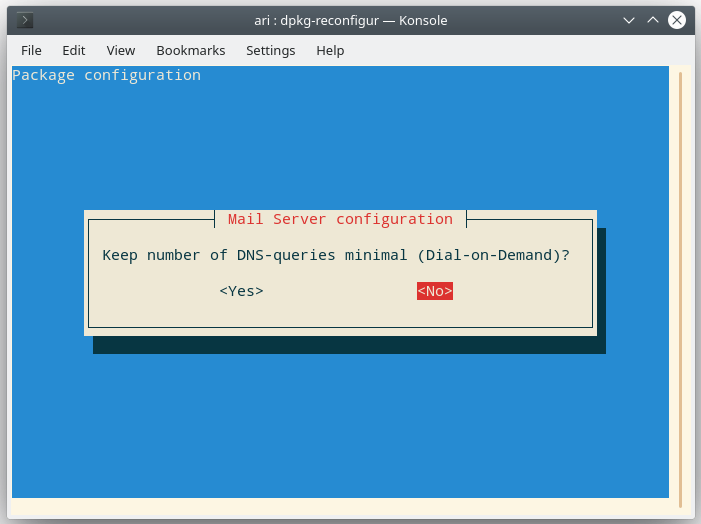
Assuming the computer where you are installing the mail server has broadband connection, choose No.
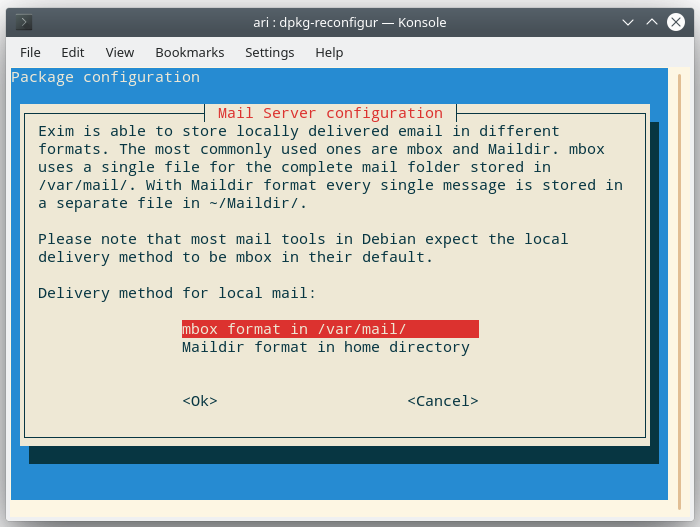
This mail server won’t receive messages, but let the configuration choose the default option for mailbox format which is mbox.
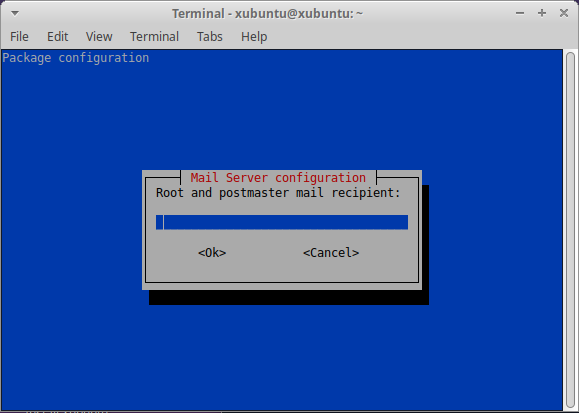
Root and Postmaster mail recipient: enter an email address that you use regularly. These messages for the root are generated by the operating system, and include alerts and notifications.
The next step is to test if the mail server can send messages.
Testing and troubleshooting
A quick test for the email server can be achieved by sending a message with sendmail:sendmail your.email@address.net
your test message is here
[Hit key combination ctrl d when you are ready to send the message]
If you don’t receive the test message to your inbox, view the log file:/var/log/exim4/mainlog
Any error messages referring to domain names may indicate that the receiving email server wasn’t happy with your host’s domain name. Check the content of the following file:/etc/mailname
The line should contain a valid domain name that DNS servers recognize.
The configuration file for exim4 is located here if you want to modify it manually:/etc/exim4/update-exim4.conf.conf
NOTE: if you manually edit the configuration or mailname file, restart exim4 after saving the new configuration.
A configuration guide for Ubuntu (only minor differences) can be viewed here.
If the exim4 log file says something like:
SMTP error from remote mail server after RCPT TO:<name@domain.com>: 450 4.7.1 Client host rejected: cannot find your reverse hostname, [your.ip.add.ress]
…continue to the next section that explains how to solve the problem.
Configure exim4 to send your email via a smarthost
ISPs have increased controls for reducing spam, and many of them check if the sending IP address has a PTR record in the DNS system. You can’t set the PTR record yourself, but ISPs can (here is more information). You can check the status of your IP address with the mxtoolboox service (choose Reverse Lookup in the button).
Fortunately, exim4 can handle this situation. You must, however, have an email account with an email service provider that lets you access its SMTP. If you are using an email client app, like Thunderbird or K-9, and are able to send messages, you have access to an SMTP that you can use for configuring exim4.
Exim4 calls this feature smarthost. It means that your exim4 server transfers your outgoing mail to another SMTP server that sends the messages wherever they need to go. Here is how to set up a smarthost for exim4.
Start the configuration program: dpkg-reconfigure exim4-config
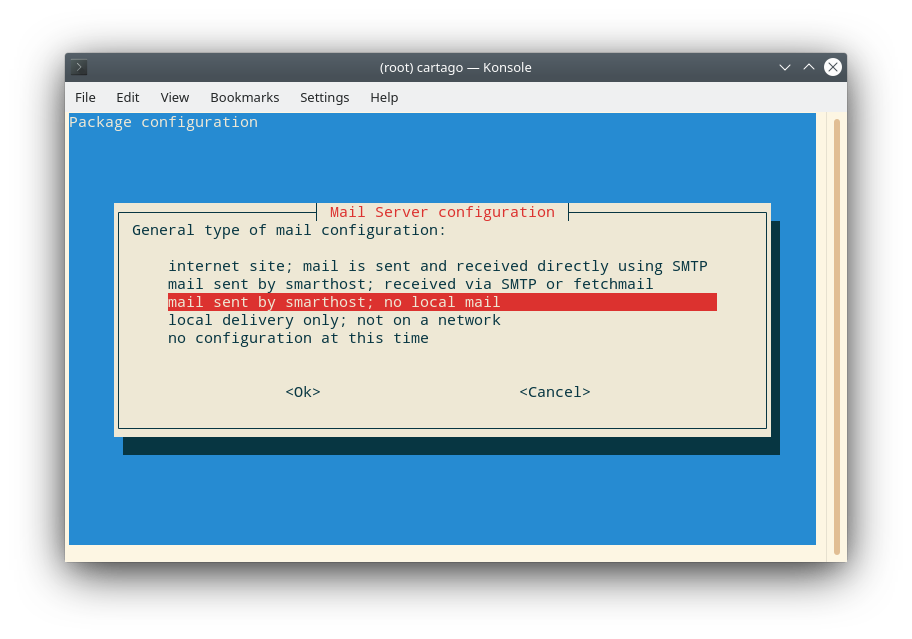
General type of mail configuration: If you won’t be receiving email on this server, select configuration: mail sent by smarthost; no local mail
Mail name: The domain of the email account that you will use for accessing SMTP. If your email address is myname@cooldude.com, cooldude.com goes here.
Visible domain name: cooldude.com is a good option here as well.
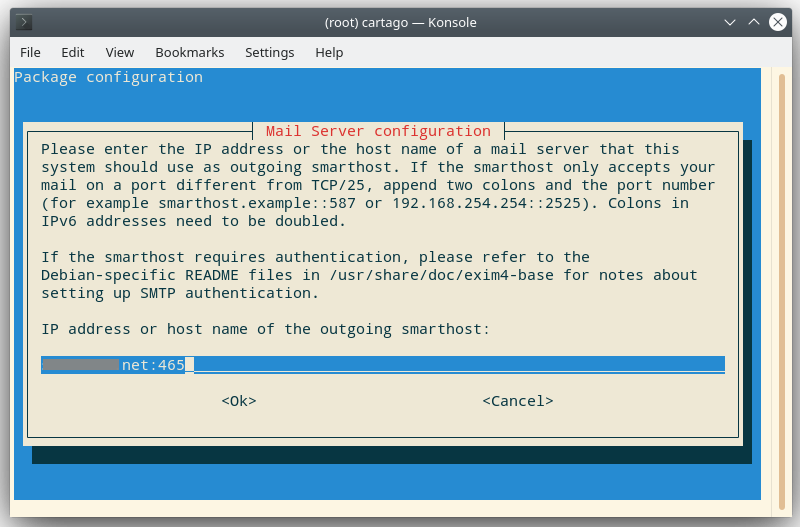
IP address or name of the outgoing smarthost (in other words, SMTP): check your email client app for the correct SMTP settings, or read your email provider’s documentation. For instance, in my case, the SMTP must be accessed via port 465.
Once the configuration program has ended, you have to insert a new line that includes your login credentials into the file /etc/exim4/passwd.client
smtp.name.net:myname@cooldude.com:coolpassword
- smtp.name.net is the name of the email provider’s SMTP server:
- Myname@cooldude.com is your email account on the email system:
- Coolpassword is your password for the email account
As you can see, your email password is in the exim4 config file as plain text. Ensure that only root and exim has access to the file.
Now, you can test your email by sending a message from your server.
For troubleshooting, the best place to start is the log file at /var/log/exim4/mainlog.